License File
License files control software licenses in disconnected or protected environments, where the application may not be able to reach the Babel Licensing Service. You can create a license file in two ways:
- offline, with the
liccommand line tool, without any service; - on the Babel Licensing Service, with Babel Desktop or the Data Center web application, and then export it.
This page shows how to create a license file and how to validate it in your .NET application.
Prerequisites
The Babel Licensing Service is needed only if you create the license file on the service. In that case, make sure that the Babel Licensing Service is running on your server as per the instructions provided in the Getting Started section. Then, create a test product and a corresponding license template by referring to the instructions below. If you generate the license file offline with lic, you can skip this step.
Next, you will need to download the license file client source code from GitHub. This client code enables the integration of license file capabilities into your .NET application. Use the following command to clone the repository:
git clone https://github.com/babelfornet/license-file-console-example.gitWhen you create the license file on the Babel Licensing Service, it is based on a corresponding license template.
Creating a License File
When generating a license file, you can specify various details such as the licensee, the product, the expiration date, the allowed features, and any custom license fields. The license file is digitally signed to ensure its integrity and authenticity.
With Babel Desktop
To create a license file with Babel Desktop, follow these steps:
Connect to the service
Open Babel Desktop and click the icon of your Babel Licensing Service profile in the activity bar. Generating licenses requires a Local test profile with Local management, so run Babel Desktop on the service machine; for a remote service use the web application or the Management API.
Generate a license
Open the Licenses view and choose Generate license on the toolbar.
Select the template and signature key
In the Template group, select the license Template (see License Templates) and the Signature key. When no signature key is selected, the key of the template, or of its product, is used.
Set the mode to File
In the Terms group, set Mode to File. A user key is not needed for a file license.
Enter the licensee and license details
Enter the licensee information (a licensee name or company is required), the issue and expire dates, and any Fields and Features required.
Save the license
Save the form. The service generates and signs the license, which appears in the licenses grid.
Export the license file
Select the license and choose Export license key… on the toolbar. The file is saved in the license export folder configured in the Licensing settings, named after the license id. Rename it ClientFile.licenses or ClientFile.lic for this example.
With the Data Center edition you can also generate and download the license from the Licenses page of the web application.
With the lic Command Line
To create the license file offline, without the Babel Licensing Service, use the lic command line tool. Sign the license with the same key the application uses to validate it; for this example, the Keys.snk file:
lic ClientFile.dll --keyfile Keys.snk --sign --licensee name="Contoso" --expiredate 365 --feature Pro=1 --output ClientFile.licensesEvery option is described in the Reference.
You can now distribute the license file to your customers or use it to deploy the license in disconnected or protected environments where the Babel Licensing Service is not accessible.
Configuring a Client
To enable license validation using a license file, you need to integrate the Babel Licensing library into your .NET application. The library provides a set of APIs and methods that facilitate the license validation process. By referencing the Babel Licensing library and incorporating the necessary code, you can ensure that your application validates the license file correctly.
To open the license file console sample project, follow these steps:
Locate the sample project
Navigate to the location where the license file sample project is stored.
Copy the license file
Copy the license file ClientFile.licenses in the project folder.
Open the solution
Double-click on the ClientFile.sln solution file to open it in your preferred Integrated Development Environment (IDE), such as Visual Studio.
Check the client library reference
Once the project is open, ensure that the Babel Licensing client library is referenced correctly. If the reference is missing, please refer to the Client Components paragraph to configure a local NuGet repository.
Build the solution
After ensuring the correct references, build the solution by selecting the “Build” or “Rebuild” option from the IDE’s menu.
Run the application
Once the solution is successfully built, you can run the application in debug configuration by pressing the “Start Debugging” button or using the keyboard shortcut specific to your IDE (e.g., F5 in Visual Studio). The license file console sample application will launch, validating the license file and showing the licensee information.
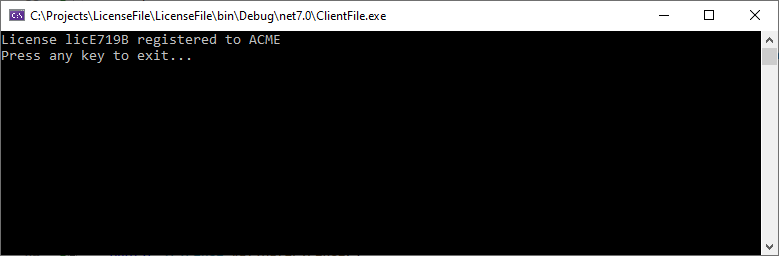
License File Validation Example
Follow the client application source code:
using System;
using Babel.Licensing;

class Program
{
    /// <summary>
    /// Public key used to validate the license signature.
    /// </summary>
    static string PublicKey => "MIGfMA0GCSqGSIb3DQEBAQUAA4GNADCBiQKBgQDE1VRiIdr6fiVZKve7NVgjIvGdRiRx0Mjjm+Yzf6tLbzFnxLs0fat5EoRcubxx0QQQDfydsJBE/fc7cwRWSrE2xK6X4Eb4W8O47pCMjqvTQZfDqQywEZJrLlxpp9hlKz6FDYX4SagrjmP1gdw8olo+n+IBz8ubkNxRhvycikxuDQIDAQAB";

    static Program()
    {
        // Register the file license provider for the Program class
        // that will be used by the BabelLicenseManager to locate the license file.
        // The license file should be named as the assembly name with .licenses extension.
        BabelFileLicenseProvider provider = new BabelFileLicenseProvider();

        // Sets the public key used to validate the license signature
        provider.SignatureProvider = RSASignature.FromKeys(PublicKey);

        // Uncomment the following line to customize the license file path
        // provider.LicenseFilePath = "license.xml";

        // Register the provider for the Program class
        BabelLicenseManager.RegisterLicenseProvider(typeof(Program), provider);
    }

    static void Main(string[] args)
    {
        var program = new Program();

        try
        {
            var license = program.ValidateLicense();

            Console.WriteLine($"License {license.Id} registered to {license.Licensee?.Company}");
        }
        catch (Exception ex)
        {
            Console.WriteLine(ex.Message);
        }

        Console.WriteLine("Press any key to exit...");
        Console.ReadKey();
    }

    public ILicense ValidateLicense()
    {
        // Uses the registered file license provider for Program class
        return BabelLicenseManager.Validate(typeof(Program), this);
    }
}
Inside the static constructor of the Program class, the file license provider is registered using the BabelFileLicenseProvider. This provider is responsible for locating and validating the license file for the Program class. By default, the license file should have the same name as the assembly with the extension .licenses or .lic.
Extracting and Securing the Public Key
In the provided code, the PublicKey property is used to hold the public key required for validating the license signature. It is set to a specific value extracted from the Keys.snk file.
var rsa = RSASignature.CreateFromKeyFile("Keys.snk");
string publicKey = rsa.ExportKeys(true);
To extract the public key from the Keys.snk file, the code uses the RSASignature.CreateFromKeyFile method, passing the file name as the parameter. This method creates an RSASignature object that represents the key pair stored in the Keys.snk file. Then, the ExportKeys method is called on the RSASignature object with the parameter true to export the public key. This method returns a string representation of the public key.
The Keys.snk file contains the private key and should not be deployed with the application. The private key must be kept secure and not exposed to unauthorized access.
Use license files when the application has limited or no connection to the Babel Licensing Service. You generate them with Babel Desktop or the lic command line, and they are easy to deploy and move between systems. The signed file keeps the licensing terms under your control even offline, and your .NET application validates it without contacting the service.
License Validation With License Manager
In addition to the BabelFileLicenseProvider, Babel Licensing provides alternative methods for license validation using specific license manager classes. These classes, such as XmlLicenseManager and StringLicenseManager, offer flexibility in handling the loading and validation of license keys without relying on the BabelFileLicenseProvider for finding the license file.
The XmlLicenseManager class is designed to work with XML-based license files. It allows users to set the public key used for validating the license signature and provides methods to read the license key from an XML file, validate it, and retrieve the validated license object.
Here’s an expanded explanation of the code snippet provided:
public ILicense ValidateLicenseWithXmlLicenseManager()
{
    // Uses the Xml license manager
    XmlLicenseManager manager = new XmlLicenseManager();

    // Sets the public key used to validate the license signature
    manager.SignatureProvider = RSASignature.FromKeys(PublicKey);

    // Reads the license from the license file
    string licenseKey = File.ReadAllText("ClientFile.lic");

    // Validates the license
    return manager.Validate(licenseKey, typeof(Program), this);
}
The StringLicenseManager class is another option that allows users to validate license keys directly from an encoded string. This can be useful when the license information is obtained from a different source, such as a database or an API response.
Both the XmlLicenseManager and StringLicenseManager classes provide alternative ways to handle license validation and offer flexibility in controlling the loading and validation process. They allow users to define their own logic for accessing the license key and provide a means to verify the license’s authenticity and integrity using the specified public key.